

If you have those DIY ripped knee jeans in your wardrobe that you haven’t worn in a long time? Do you know how to rip jeans or rip my jeans? If that’s the case, don’t let them hang around; instead, use our torn denim tutorial to make stylish trousers.
There’s something about torn denim that brings out the inner punk. All you need are a few items and 15 minutes, whether you only want a few holes or want to make a funky and sleek pair of trousers. DIY ripped knee jeans are making a comeback, thanks to celebrities like Olivia Palermo and Heidi Klum matching frayed jeans with the best luxury handbags, and street style stars are known for their designer-heavy personal style turning torn denim into an off-duty uniform. The question is, how to rip jeans effectively without completely ruining them?
It’s never easy to hit the stores in search of the right pair of DIY ripped knee jeans, and the trouble with buying pre-distressed denim is that you have no control over where the rips are located, and you might end up with a DIY ripped knee jeans. We all have different tastes when it comes to the positioning, scale, and scope of the tears, and while some people choose large, airy gaping tears, others choose tidy little rips on the thigh or discreet scuffing around the pockets or how to rip jeans, so isn’t learning how to rip jeans yourself the best solution how to rip jeans?
The way you distress your jeans is often determined by the type of DIY ripped knee jeans you’re wearing. When it comes to boyfriend pants, the totally all-over distressed look (à la Diane Kruger) is the most flattering. Small rips over the knees or a little distressing elsewhere is better for skinny jeans (see Heidi Klum for inspiration). As a result, the safest option for DIY ripped knee jeans is to do it yourself.
How do you tear DIY ripped knee jeans like a pro?
Make any test runs
When it comes to learning how to wear DIY ripped knee jeans, what is the golden rule? Keep your horses before grabbing your favorite MiH jeans and attacking them with a pair of nail scissors: you’ll need to try it out on an old, less-loved pair of jeans first.
You can also practice on some old jeans from the nearest charity shop.
This is a crucial move, believe us.
Remove and wash them
Give your DIY ripped knee jeans a couple of washes to give them an authentically ‘worn’ look and to rough up the fibers before you start. If you apply a little chlorine to the wash, it will help to break down the color (just don’t put something else in the system with them!).
Put them on and make a note of it
Put on your DIY ripped knee jeans, and mark where you like your rips and distressing with a marker, chalk, safety pins, or dress pins. The best marker to use depends on the density of the denim and its similarity to the skin; we find chalk to be the most accident-proof. After that, put them down on the floor and go over the lines with chalk or a marker to make them easy to see.
Equipment for ripped jeans
A cheese grater, steel wool, sandpaper, and a pumice stone or foot file are the right tools for making the DIY ripped knee jeans look as torn as possible. Use a pair of tiny but sharp nail scissors to make holes; accuracy is crucial here. To cover the back of the pants, wedge a piece of cardboard or a tiny wooden block within the thighs – this look is supposed to be uncontrived because any symmetry can stand out. We’re going for a laid-back vibe.
How to Make Ripped Jeans In 5 Easy Steps
It’s a great art to wear torn denim. Ripped jeans are clearly not a recent trend—not even near. Since the 1980s, the distressed look has gone in and out of favor, but it seems that it is now more prevalent than ever. From street style stars wearing distressed jeans with It-bags to celebrities like Gigi Hadid, Kim Kardashian, Rihanna, Kendall Jenner, and Selena Gomez who wear broken denim all the time, holes are everywhere.
The issue with purchasing already-distressed denim is that you have no influence over the rips. That may sound like a Champagne challenge, but when it comes to the placement, scale, and depth of our tears, we all have preferences.
Do we want two gaping holes at the elbows, a few small nicks, or a cut down the leg? Are we looking for anything a little more risqué or something for a relaxed Friday? That’s why, rather than spending $200 on a designer pair, we recommend doing it yourself.
Here are five easy steps to ripping denim on your own.
1. Choose a Denim Style
Obviously, the first step is to decide which pair of jeans you want to tear. Is it boyfriend type or tight and skinny? What color do you prefer: black, white, or blue? Is it better to wear high-waisted or DIY ripped knee jeans?
We think that doing a few practice runs of a pair of DIY ripped knee jeans you don’t wear anymore or denim you’ve found for cheap at Goodwill or the Salvation Army is the safest way to go. You don’t want to start wearing the latest $200 J Brands with a scissor just yet. Until you start, wash your jeans a couple of times in hot water with a little bleach to make them look extra-worn. If not, keep reading!
2. Gather the Distressing and Ripping Materials
Before you start cutting the how to put holes in your jeans, distress them a little to make them look more authentically torn. You’ll need sandpaper or a paint-removing brick, steel wool, and a pumice stone to do this. Using a pair of super-sharp small scissors, an X-Acto knife, or a box cutter to make the gaps. We prefer to use a sheet of cardboard or a little wooden block inside the pant legs so the back of the DIY ripped knee jeans isn’t altered because you want it to be.
3. Put on your jeans to make a mark
Mark the precise location of your rips and/or damaged areas with a pen, pencil, or a safety pin. You would even want to get a ruler. It’s crucial to do this while standing.
4. Begin to Distress
Start rubbing the outlined areas with sandpaper, steel wool, and the pumice stone until the denim begins to thin out and look worn. The length of time it takes to complete this move is obviously determined by the thickness of your denim. Tape some sandpaper to the surface, put your jeans back on, and slide around on the paper if you really want to go for it in the knee or butt section.
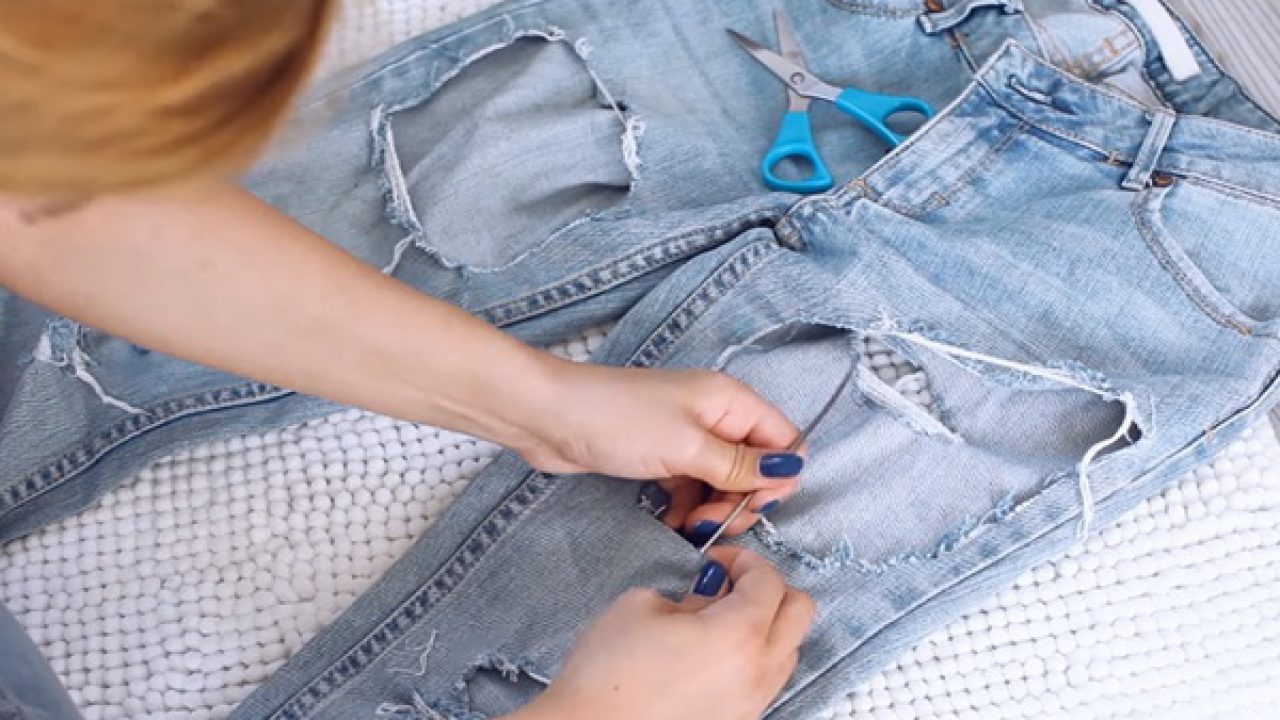
5. Begin digging your holes
After your DIY ripped knee jeans are sufficiently distressed, take your scissors or knife and start horizontally scratching the place where you want your rips to be with the edge (not the tip). Scrape enough to see the white horizontal threads underneath the denim’s surface if you don’t want holes all the way in. If you’ve arrived, begin fraying the threads with a tweezer. Start cutting the distressed areas with your knife or scissors if you’re after skin.
Conclusion
Now comes the section that is a little more difficult. Use the side (not the tip) of the scissors to shave down the length of the DIY ripped knee jeans horizontally in the places where you want the rips to shape (a penknife is also suitable because they are very precise).
When you see the white strings, come to a halt. Take your tweezers and fray the threads sporadically. Break the threads with your scissors or penknife if you like holes. Finally, use your grater, pumice block, or sandpaper to rough up any other places where normal wear and tear can be expected, such as the knees, a bag, or down the foot.